on
13 mins to read.
Data Augmentation in Tensorflow
This post is a comprehensive review of Data Augmentation techniques for Deep Learning, specific to images. Data augmentation is one of the regularization technique. It consists of generating new training instances from existing ones, artificially boosting the size of the training set.
It will reduce the overfitting. The trick is to generate realistic training instances. Ideally a human should not be able to tell which instances were generated and which ones were not. Many of these tricks are used in Convolutional Neural Network. However, instances should be generated on the fly during training, which computationally efficient, rather than wasting storage space and network bandwidth. Tensorflow offers several image manipulation operations such as transposing (shifting), rotating, resizing, flipping and cropping, as well as adjusting the brightness, contrast, saturation and hue. This makes it easy to implement data augmentation for image datasets.
In order to illustrate the different augmentation techniques we need a image, which is a cute corgi puppy picture! 
import matplotlib.image as mpimg
import matplotlib.pyplot as plt

#Read Image
img = mpimg.imread('image.jpeg')

# Output Images
plt.imshow(img)

#Image shape
height, width, channels = img.shape
#(187, 269, 3)
#(Height, Width, Channel)
The image is RGB with height 187 and width 269.

Flip
You can flip images horizontally and vertically. Some frameworks do not provide function for vertical flips. But, a vertical flip is equivalent to rotating an image by 180 degrees and then performing a horizontal flip.
Vertical Flip
shape =  [height, width, channels]
x = tf.placeholder(dtype = tf.float32, shape = shape)
flip_1 = tf.image.flip_up_down(x) #Vertical flipping

with tf.Session() as sess:
    img_flip_1 = sess.run(flip_1, feed_dict={x: img})
    plt.imshow(img_flip_1.astype(np.uint8))
Horizontal Flip
shape =  [height, width, channels]
x = tf.placeholder(dtype = tf.float32, shape = shape)
flip_2 = tf.image.flip_left_right(x) #Horizontal flipping

with tf.Session() as sess:
    img_flip_2 = sess.run(flip_2, feed_dict={x: img})
    plt.imshow(img_flip_2.astype(np.uint8))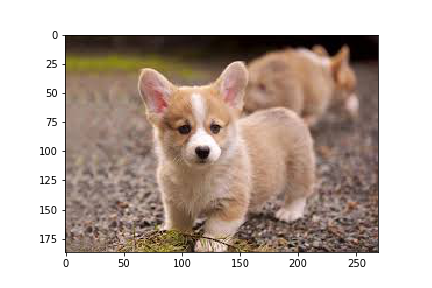
Random Flipping
Randomly flips an image vertically (upside down) with a 1 in 2 chance, otherwise output the image as-is.
shape =  [height, width, channels]
x = tf.placeholder(dtype = tf.float32, shape = shape)
flip_3 = tf.image.random_flip_up_down(x)

with tf.Session() as sess:
    img_flip_3 = sess.run(flip_3, feed_dict={x: img})
    plt.imshow(img_flip_3.astype(np.uint8))
Randomly flips an image horizontally (left to right) with a 1 in 2 chance, otherwise output the image as-is.
shape =  [height, width, channels]
x = tf.placeholder(dtype = tf.float32, shape = shape)
flip_4 = tf.image.random_flip_left_right(x)

with tf.Session() as sess:
    img_flip_4 = sess.run(flip_4, feed_dict={x: img})
    plt.imshow(img_flip_4.astype(np.uint8))
Alternatively you can also use tf.reverse for the same. tf.reverse accepts an additional argument i.e. axis which defines where the image should be flipped along x axis or y axis.
img_1 = tf.reverse(img, axis =[0]) #Verticle flipping
img_2 =  tf.reverse(img, axis =[1]) #Horizontal flipping

with tf.Session() as sess:
    img_1_eval = img_1.eval()
    plt.imshow(img_1_eval.astype(np.uint8))

    img_2_eval = img_2.eval()
    plt.imshow(img_2_eval.astype(np.uint8))
Rotation
NOTE: k denotes the number of times the image is rotated by 90 degrees anti-clockwise.
shape = [height, width, channels]
x = tf.placeholder(dtype = tf.float32, shape = shape)
rot_90 = tf.image.rot90(img, k=1)
rot_180 = tf.image.rot90(img, k=2)

with tf.Session() as sess:
    rot_90_eval = rot_90.eval()
    plt.imshow(rot_90_eval.astype(np.uint8))

    rot_180_eval = rot_180.eval()
    plt.imshow(rot_180_eval.astype(np.uint8))

In order to rotate in any angle, we use tf.contrib.image.rotate() function of Tensorflow. In the example below, angles is in radians, which is angels = degrees * math.pi / 180. Let’s do 135 degrees anticlockwise rotation:
shape = [height, width, 3]
y = tf.placeholder(dtype = tf.float32, shape = shape)
rot_tf_135 = tf.contrib.image.rotate(y, angles=2.356194490192345, interpolation='NEAREST')

#if you use a tensor of shape (num_images, num_rows, num_columns, num_channels) (NHWC),
#angles argument should be a vector of length num_images, with an angle for each image in the batch.
#interpolation: Supported values: "NEAREST", "BILINEAR".

with tf.Session() as sess:
    rot_tf_135_eval = sess.run(rot_tf_135, feed_dict={y: img})
    plt.imshow(rot_tf_135_eval.astype(np.uint8))
Brightness
Changes the brightness of an image
brght_img = tf.image.adjust_brightness(img, delta= 0.4)
with tf.Session() as sess:
    brght_img_eval = brght_img.eval()
    plt.imshow(brght_img_eval.astype(np.uint8))
Where delta is the amount of the value to be added to each pixel. The larger the value of the delta is the brighter the image will be. If delta is negative than the image will be dark. If you want to apply the random brightness, where a delta randomly picked in the interval [-max_delta, max_delta), then you can use the function below:
brght_img_random = tf.image.random_brightness(img, max_delta=0.5)
with tf.Session() as sess:
    brght_img_random_eval = brght_img_random.eval()
    plt.imshow(brght_img_random_eval.astype(np.uint8))
Crop
Central Crop
Crops the central region of the image(s). Remove the outer parts of an image but retain the central region of the image along each dimension. If we specify central_fraction = 0.5, this function returns the region marked with “X” in the below diagram.

This function works on either a single image (image is a 3-D Tensor), or a batch of images (image is a 4-D Tensor).
central_cropped_image = tf.image.central_crop(img, 0.5)
with tf.Session() as sess:
    central_cropped_image_eval = central_cropped_image.eval()
    plt.imshow(central_cropped_image_eval.astype(np.uint8))
crop_to_bounding_box
Crops an image to a specified bounding box.
This op cuts a rectangular part out of image. The top-left corner of the returned image is at offset_height, offset_width in image, and its lower-right corner is at offset_height + target_height, offset_width + target_width.
crop_to_bounding_box_image = tf.image.crop_to_bounding_box(img,offset_height = 75, offset_width = 120, target_height = 50, target_width = 100)
with tf.Session() as sess:
    crop_to_bounding_box_image_eval = crop_to_bounding_box_image.eval()
    plt.imshow(crop_to_bounding_box_image_eval.astype(np.uint8))
Random Crop
Unlike scaling, we just randomly sample a section from the original image. We then resize this section to the original image size. This method is popularly known as random cropping.
original_size = [height, width, channels]
x = tf.placeholder(dtype = tf.float32, shape = original_size)
# Use the following commands to perform random crops
new_height=50
new_width=100
channels=3
crop_size = [new_height, new_width, channels]

cropped_img = tf.random_crop(value = x, size = crop_size, seed = 42)
#Randomly crops a tensor to a given size.
#Slices a shape size portion out of value at a uniformly chosen offset. Requires value.shape >= size
#If a dimension should not be cropped, pass the full size of that dimension. For example, RGB images can be cropped with size = [crop_height, crop_width, 3].

cropped_img_resized_to_original = tf.image.resize_images(cropped_img, size = (187, 269))

with tf.Session() as sess:
    cropped_img_eval = cropped_img.eval(feed_dict={x: img})
    plt.imshow(cropped_img_eval.astype(np.uint8))

    #Let's resize the this cropped image back to original size
    cropped_img_resized_to_original_eval = cropped_img_resized_to_original.eval(feed_dict={x: img})
    plt.imshow(cropped_img_resized_to_original_eval.astype(np.uint8))

Since we set the seed, it will always crop the same area. However, if seed=None, every time you run this cell, a different part of the image will be cropped and resized to original size.
Gaussian Noise
Adding just the right amount of noise can enhance the learning capability.
shape = [height, width, channels]
x = tf.placeholder(dtype = tf.float32, shape = shape)
# Adding Gaussian noise
noise = tf.random_normal(shape=tf.shape(x), mean=0.0, stddev=1, dtype=tf.float32)
noise_img = tf.add(x, noise)

with tf.Session() as sess:
    noise_img_eval = noise_img.eval(feed_dict={x: img})
    plt.imshow(noise_img_eval.astype(np.uint8))
Color augmentations
Color augmentations are applicable to almost every image learning task. In Tensorflow there are three color augmentations readily available: hue, saturation and contrast. These functions only require a range and will result in an unique augmentation for each image.
random_hue_img = tf.image.random_hue(img, 0.08)
random_saturation_img = tf.image.random_saturation(img, 0.6, 1.6)
random_contrast_img = tf.image.random_contrast(img, 0.7, 1.3)

with tf.Session() as sess:
    random_hue_img_eval = random_hue_img.eval()
    plt.imshow(random_hue_img_eval.astype(np.uint8))

    random_saturation_img_eval = random_saturation_img.eval()
    plt.imshow(random_saturation_img_eval.astype(np.uint8))

    random_contrast_img_eval = random_contrast_img.eval()
    plt.imshow(random_contrast_img_eval.astype(np.uint8))


Other Methods
Apart from the above methods there are similar methods which can be used for image augmentation as below:
- tf.image.adjust_contrast
- tf.image.adjust_hue
- tf.image.adjust_gamma